Features
Environment Research
Research
Know the soil, know the solution
Manure can aid crop yields, but only when soil and manure testing results are known.
June 1, 2023 by Ronda Payne
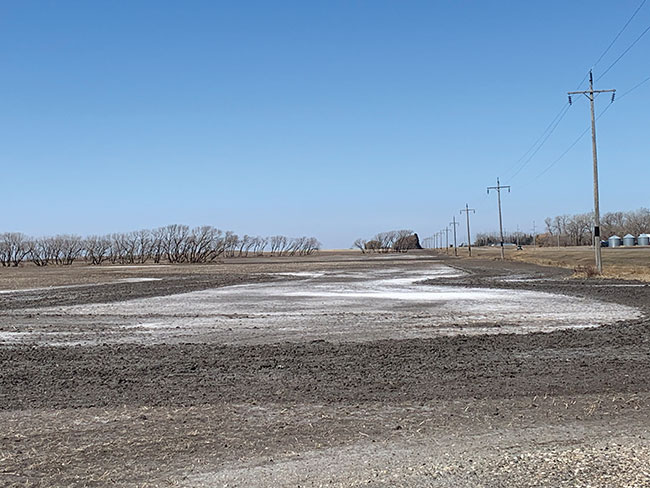 In some states, such as North Dakota (pictured), a wet and busy spring makes for a less-than-ideal time for sampling, meaning it is best saved for fall.
 Those who cook know that tasting along the way is an essential aspect of the process. People taste, find something lacking and then add. The same theory applies to soil – although taste-testing is not recommended. What is recommended is scientific testing of the soil for a variety of nutrients, minerals and other aspects to fully understand what it needs.
If there is an interest in adding manure to the soil to increase nutrient levels, the same logic applies. It’s important to know what the manure’s properties are before adding them to the soil to determine if they will fulfill the needs of future crops by supplementing what exists in the soil.
Naeem Kalwar, extension soil health specialist with North Dakota State University brings extensive knowledge of soil sampling to farmers. His colleague, Leslie Johnson, associate extension educator in animal manure management with the University of Nebraska–Lincoln, brings the understanding of manure sampling to the fold. It’s essential information for farmers who know they need to understand their soil and inputs in order to get the best results.
Learning from the soil
“Frequency of soil sampling depends upon the sampling objectives,” says Kalwar.
Testing for soil fertility should be performed at the same time each year. Looking at other factors, such as soil salinity, would be done less frequently; perhaps every two or three years depending upon the site, but like testing for fertility, the time of year must stay consistent.
Consistency in test timing is important because nutrient results are often different in spring versus fall and it’s necessary to monitor field changes over the long term. For example, testing in the early spring – pre-planting – may reveal an abundance of certain nutrients plants need whereas testing in the fall will reveal another picture – that of nutrient use of plants post-harvest. While both results are important and can inform farming management practices, assessing soil over multiple years must compare apples-to-apples, rather than immediate crop needs or usage.
Kalwar says that in North Dakota, most soil fertility testing is done in the fall.
“That gives [farmers and soil consultants] enough time during the winter to figure out their fertility programs,” he says, but adds that depending upon what information is desired, “it is a matter of when the fields are ready and convenient.”
Results from testing give farmers the ability to optimize the results of their land.
“That includes avoiding over- and under-applying fertilizers and planting crops on areas that may not be suitable for a particular crop,” he notes. “Plant nutrient levels change spot-to-spot throughout a land base due to differences in soil organic matter, mineralization, pH, soil moisture and temperature.”
Sampling 101
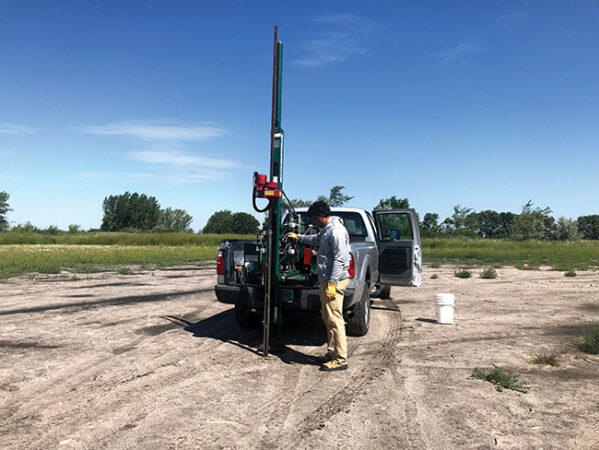
Soil sampling is not difficult, but does require pre-planning and basic tools in hand. Separate the sampling area into zones. These should be based on different soil types, problematic areas, topography and other factors that would indicate reasonable variability between sections.
Using a Z or W pattern, take samples throughout each zone along the imaginary lines. Small zones may only require three to eight samples, while larger zones could need up to 15.
Push organic matter out of the way before starting, then insert the soil probe straight down into the soil in one continuous motion. Depth depends upon the depth of the roots of crops grown in the zone as well as what is being tested for. Take each sample to the same depth and keep notes of sample locations.
Put matter from all samples of one zone into a bucket or large bag and mix well, breaking up clumps and fully blending. Remove any organic matter and put about two cups of mixed soil into a labelled bag and ensure it arrives at the lab within 48 hours. Refrigeration is advised after the sample is put in the bag before shipping to ensure microorganisms don’t alter the sample’s levels from the in-field levels.
Repeat the process for each zone separately to obtain two cups of sampling material to be tested for each zone.
Kalwar suggests taking samples to a depth of up to four feet and separating each individual sample into four one-foot sections. This would require four buckets for a zone’s sample collection: one for each 12-inch section of all the core samples. While a depth of four feet is suggested, most crops have about three-feet of rooting, so this is the minimum suggested depth.
“Essentially, each soil sample is comprised of several cores and the number of cores depends upon the size of the sample area,” he says. “Use sturdy plastic bags, label the sample IDs and sampling depths clearly.”
Be clear on what the lab is testing for and what methods should be used. While some labs test for nutrients or salinity in the same way, others may have dramatically different results due to alternate methods. For long-term soil analysis, testing must be done the same way for results to be meaningful – just as sampling must be done correctly to lead to actionable results from the lab.
Only once soil is understood can applying amendments like manure come into play.
Test before application
Once the soil is understood, applying amendments like manure come into play. Johnson says in her state of Nebraska, manure samples are required annually, but most manure is tested more frequently than that.
“Because of manure’s variability, it cannot be assumed that the manure that was actually applied has the same nutrient concentrations,” she says. “Therefore, manure should be sampled prior to application to verify the nutrients that are in it and adjust any additional fertilizer that might follow.”
As soil is tested for nutrients, the need of the crop can be matched to what is in the soil and what can be added without overapplying or adding amendments the soil doesn’t need. Just as manure may not always be the right amendment for a zone in the field, the usual commercial fertilizer may not be either. It’s essential to know the nutrient needs of the soil and the crop to ensure application doesn’t result in leaching or excessive concentration of nutrients.
“Certain nutrients, particularly phosphorus, tend to build quickly with manure application as we often apply more than the crop needs,” she notes. “This is why it is important to know what you’re actually applied through sampling and verifying your application rate so that you’re not over or under applying nutrients.”
Manure sampling can be done anytime. There are different sampling methods to use depending upon the kind of manure, but like with soil, the key is to mix together several “like” samples for a representative result.
“Make sure that [the sample] is sealed well, usually double-bagged and send the sample [to the lab] early in the week,” she suggests. There is also a benefit to including an ice pack with a sample mailed in warmer periods.
Information is power
Once the soil and manure testing is done, determining application rates and calibrating equipment allow for the plan to put into action. While farmers from centuries past knew to apply manure to fields to generate higher yields and stronger plants, modern farmers have the benefit of science to see how much to apply for the right results. •